
AgriBee is an intelligent multi-sensory device which when deployed in an agricultural/ farming/ gardening/ horticulture setup, helps monitor vital statistics that directly correlate to the plant growth and enables optimal utilization of resources like water, atmospheric moisture or temperature (especially in case of green-houses/ other controlled farming environments).

After deploying the first version of AgriBee with a customer for over 3 months, we gathered their feedback and had the following goals for v2:
- Better placement and multiple sensors for optimum monitoring of soil moisture across different stages of plant growth.
- A sleeker and lighter and water-proof device to prevent damage due to flooding/ irrigation
- Improved battery life so that the field units do not need to be recharged often. (Our first version lasts about 2 months per charge with aggressive monitoring once per minute)
Based on all these inputs, we redesigned the system on 3 fronts, the embedded hardware design, optimized firmware, updated dashboard and API.
We have also gone a few steps above and beyond the requirements gathered from the field.
The following were the changes incorporated into the v2 design:
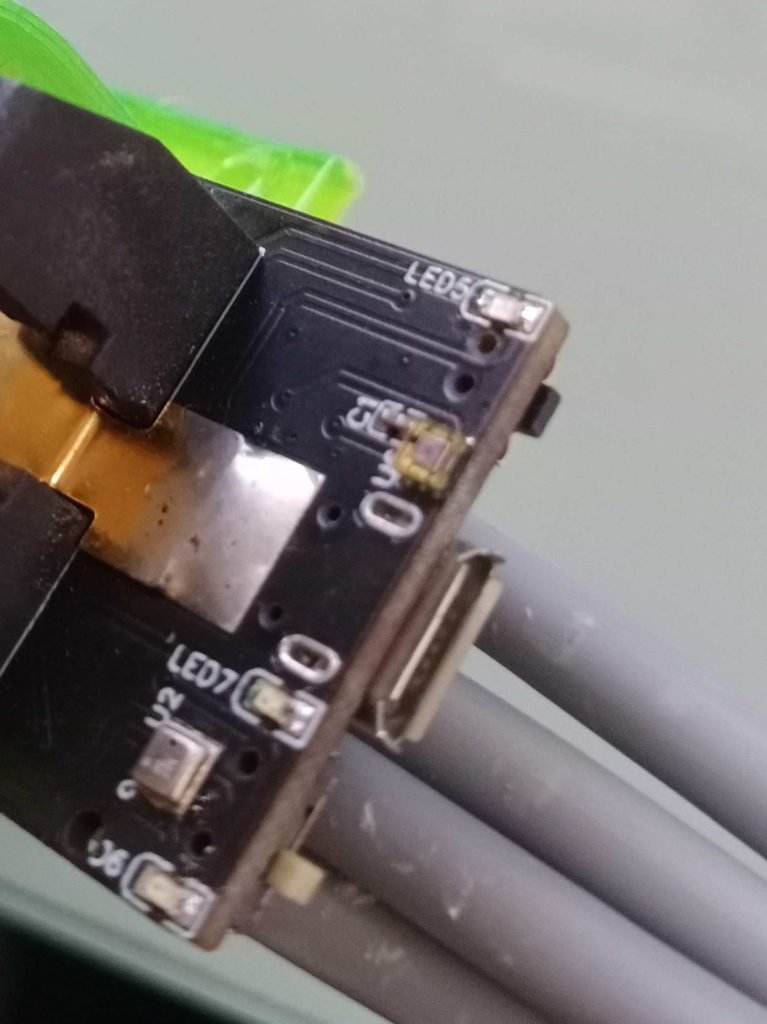
Board design/ hardware

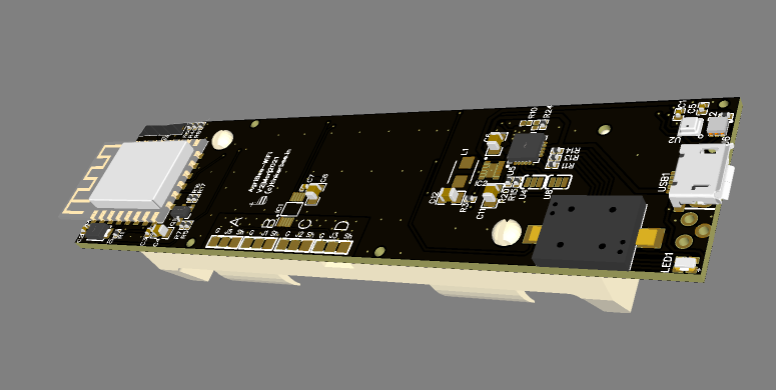
Designed a compact 25mm x 100mm PCB (just slightly larger than the size of the integrated Keystone Inc. 18650 Li-Ion cell holder on the bottom side of the PCB).
Incorporated a dedicated 4 channel capacitance measurement chip from Texas Instruments for moisture sensing. It took quite some effort to figure this one out, especially in designing the capacitive sensor elements themselves, but we’re glad we did!
Moved to an integrated Microchip Corp. IC for power battery charging and power management. The micro-USB port is for charging only.
Moved to Bosch BME280 (from BMP280 earlier) for additional atmospheric relative humidity sensing as well. BME280 gives us ambient temperature, atmospheric pressure also. We may unfortunately have to look for alternatives to this for the next batch since there are no more supplies on components sites like mouser and element14!
Added a sensor from Vishay Semiconductors for ambient light sensing.
The board incorporates a flat passive SMD mounted buzzer for audio feedback and has LEDs for power good, charging and fully charged indications.

The tiny push button we provided for input and the tiny on-off slider switch will need some change in the next version though since they are a bit too tiny. But thankfully, you need to only use them just about a couple of times in the entire device lifetime, so we would manage for now.
We’ve stuck to ESP8266, ESP-12F as our microcontroller and WiFi workhorse.
Embedded software/ firmware
The code is super optimized for low power. The microcontroller takes less than 7uA during deep sleep (which is, most of the time) except when in wakes up once during each cycle (configurable from 1 minute to a multiple hours).
Even while awake, it turns on its RF only when a defined delta is detected and data needs to be sent to the cloud server.
In addition, all the sensors are powered off and only activated through the load switch once during each wake cycle and then immediately switched off.
Effectively, we should be able to achieve a device recharge time mostly limited by the natural self-discharge of the Lithium Ion cell and or course the frequency with which the readings change significantly.
Enclosure design
We wanted to design an aesthetic and functional enclosure which would also do justice to the sleek PCB. The bulkiest part of the entire layout was the power cell and its holder.
The design was done on FreeCAD which besides being free is an extremely flexible and powerful CAD tool!

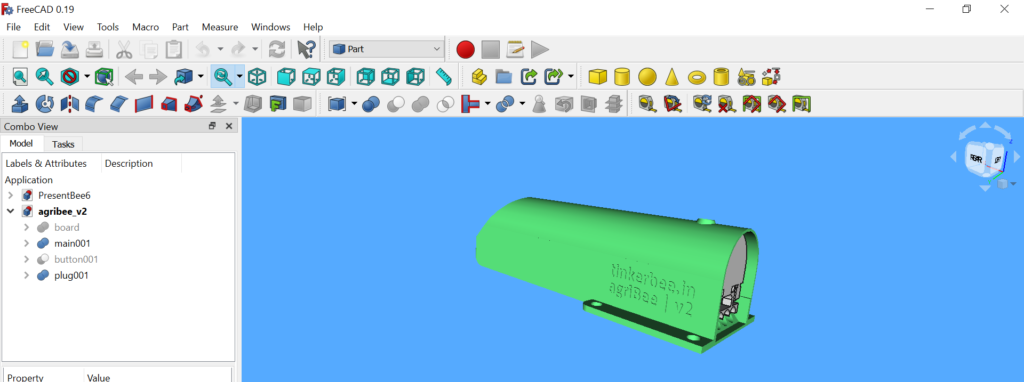
We settled for a green translucent polymer for the main body since it would nicely show out the glowing LEDs inside while also making it look aesthetically pleasing. We gave it a spaceship kinda look, because, why not 🙂 ?

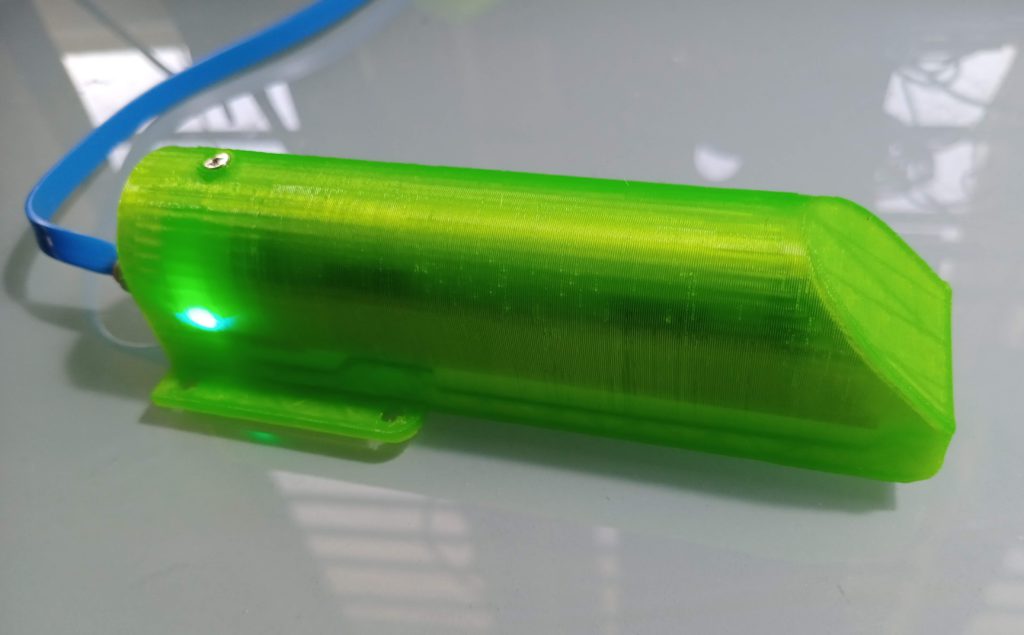

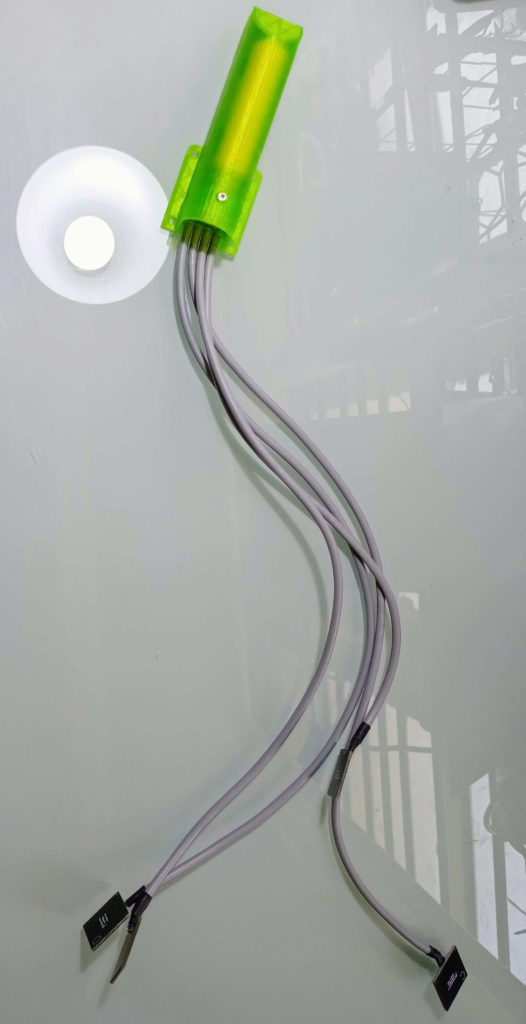
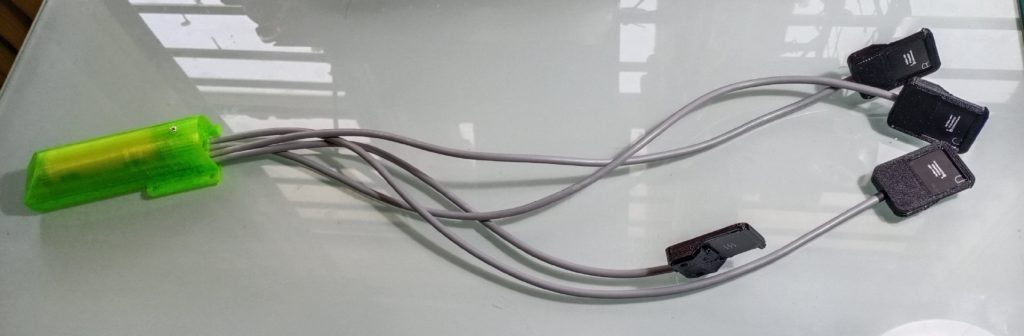
Also, because we wanted to leave only the lower bottom exposed to the elements. That is where the switches, the USB and the shielded cables for the sensors would go out from. It kinda looks like a quadropus (an intelligent 4 legged mythical cousin to an octopus 🙂
The other challenge was to ensure that the sensor PCB’s (which is a special PCB designed with directional moisture sensing) connection through a shielded cable was itself isolated from the elements. So we designed a smaller enclosure for the sensor and filled the soldering joint with a silicone sealant.

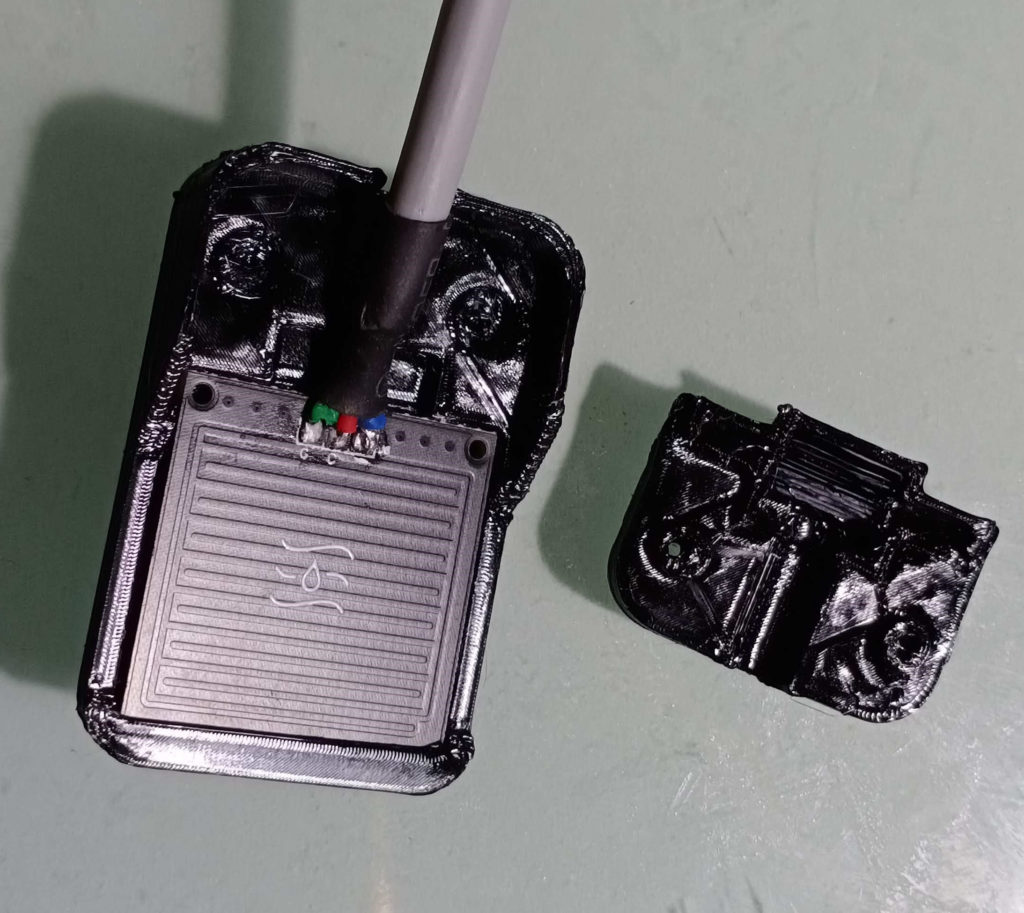
The final challenge was to design the plug that would lock the bottom opening and provide easy access to USB, switches and the sensor cables. This required about 7 takes since it was challenging to get the cut-outs for the USB, cables and switches right to a .25mm precision!
Server-side dashboard
Last year we moved to AWS after having struggled with a particular dedicated VPS server provider. The AWS experience has been amazing so far. This enables us to quickly develop, build and deploy.
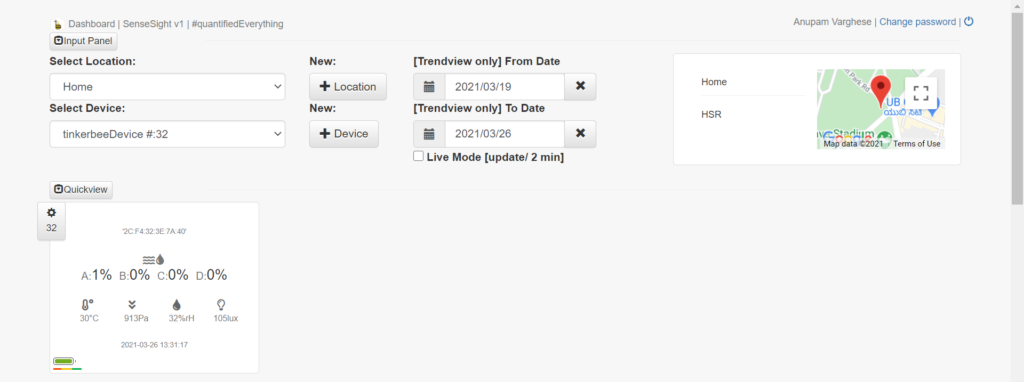
Our IoT server-side dashboard framework, SenseSight, allows us to quickly define templates for two components a QuickView box (the latest data snapshot from our end-node) and a TrendView box (a time sliced view of all the data) and of course once can pick the date range etc.
We also expose a RESTful API that can be used by our partners and third-parties to extend the functionality or to provide entirely new app/ front-end/ analytics capabilities based on the raw data fetched from our server-side.
Almost missed to mention the real-time push web-hooks that can be configured where our server invokes the partner defined web-hook on data events.
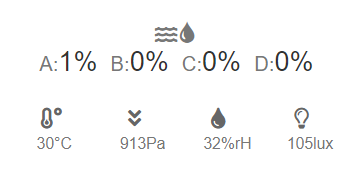
It took us less than 20 minutes to quickly add the new sensor values for AgriBee v2, building on our v1 template (atmospheric humidity, ambient light and 4 moisture readings instead of 1)
This is what the QuickView and TrendView looks like for AgriBee v2 (Yes, the data is exportable as an excel sheet as well ):


We are about to ship a small swarm of AgriBees. Here’s hoping that their swarm thrives and as bees do, nourish and flourish the places they visit.
Meanwhile, we change our focus to some other bees in our hive and of course, draw up a list of improvements for the next version.
As always, if you’re interested to adopt AgriBees into your agri-setup/ garden, do let us know. They come with a one-time device fee and a low monthly subscription fee. Lovingly designed and made in India, with quality components sourced from trusted sources and designed for the world.
Designed to #maximizeLife!
We are taking pre-orders now and will ship as soon as we reach a minimum batch size. Reach out logesh.kc@tinkerbee.in right away!


